Most people unbox an air fryer, cook one batch of frozen fries, and decide the machine is a hero or a dud. That one batch tells you almost nothing. To test a new air fryer properly you need an afternoon, an instant-read probe, and a short list of foods chosen to expose the three things that actually matter: how far the temperature drifts from the number on the screen, how much of the basket is real cooking surface, and whether the fan moves enough air to crisp food instead of steaming it.
Every machine that keeps a spot on my counter earned it the same way. It held temperature through a full cook, it crisped chicken skin without a rubbery patch in one corner, and its basket survived a month of nightly use without the coating flaking into dinner. None of that shows up on the first batch of fries.
This is the workflow I run on a new unit, in order: the checks that matter, the numbers worth logging, and the fixes to try when a machine fails a step.
Why you should trust me
I am Priya, a food blogger in Chicago. I spent nine years developing recipes before I got tired of appliances that ran hot and ruined them, and I have cooked more than 2,000 meals in air fryers since. Every one of those cooks goes into a spreadsheet: set temperature, cook time, and what a probe read inside the basket, for 40 staple foods per machine. I have also burned through three kitchens' worth of smoke alarms learning what a bad hot spot looks like.
My rules are simple. No review without at least 20 real cooks across 10 food types. No temperature claim without a probe measurement. No preset-only testing, because presets are for people who do not cook.
What the test actually measures
Four things, and only four. If a machine passes all four, it earns counter space. If it fails one, you either work around it or you return it.
Temperature swing. This is how far the machine drifts from the set temperature during a cook. A unit set to 375 that cruises at 425 will burn the outside of a chicken thigh before the center is done, and every recipe you own will be wrong in a way you cannot see coming. A machine that holds close to its set point is a machine you can trust with recipes you write yourself.
Usable footprint. Box liters are marketing. What matters is the flat cooking surface left after the basket walls, the handle, and the raised fan guard. A basket with a narrow floor holds one layer of chicken thighs, which means the capacity you paid for is really a single serving for two people. Measure it with a ruler before you judge it.
Airflow, not wattage. Crispness comes from moving hot air across the surface of the food and carrying moisture away. A 1,400 watt machine with a good fan beats a 1,700 watt machine with a lazy one every time. That is why the frozen fry test matters more than any spec sheet.
Coating durability. A basket that scratches when you look at it wrong is a basket you will hand wash twice and then hate. This one only shows up over time, which is why the last step of the test is a month of real dinners.
A word on preheat real talk: most machines claim they do not need one. Plenty of them cook like they do. Step two of the workflow is finding out which kind you bought.
Two machines built for this workflow
You can run every check below on whatever you already own. If you are shopping while you read, these are the two units in this guide, and here is what each one changes about the test.
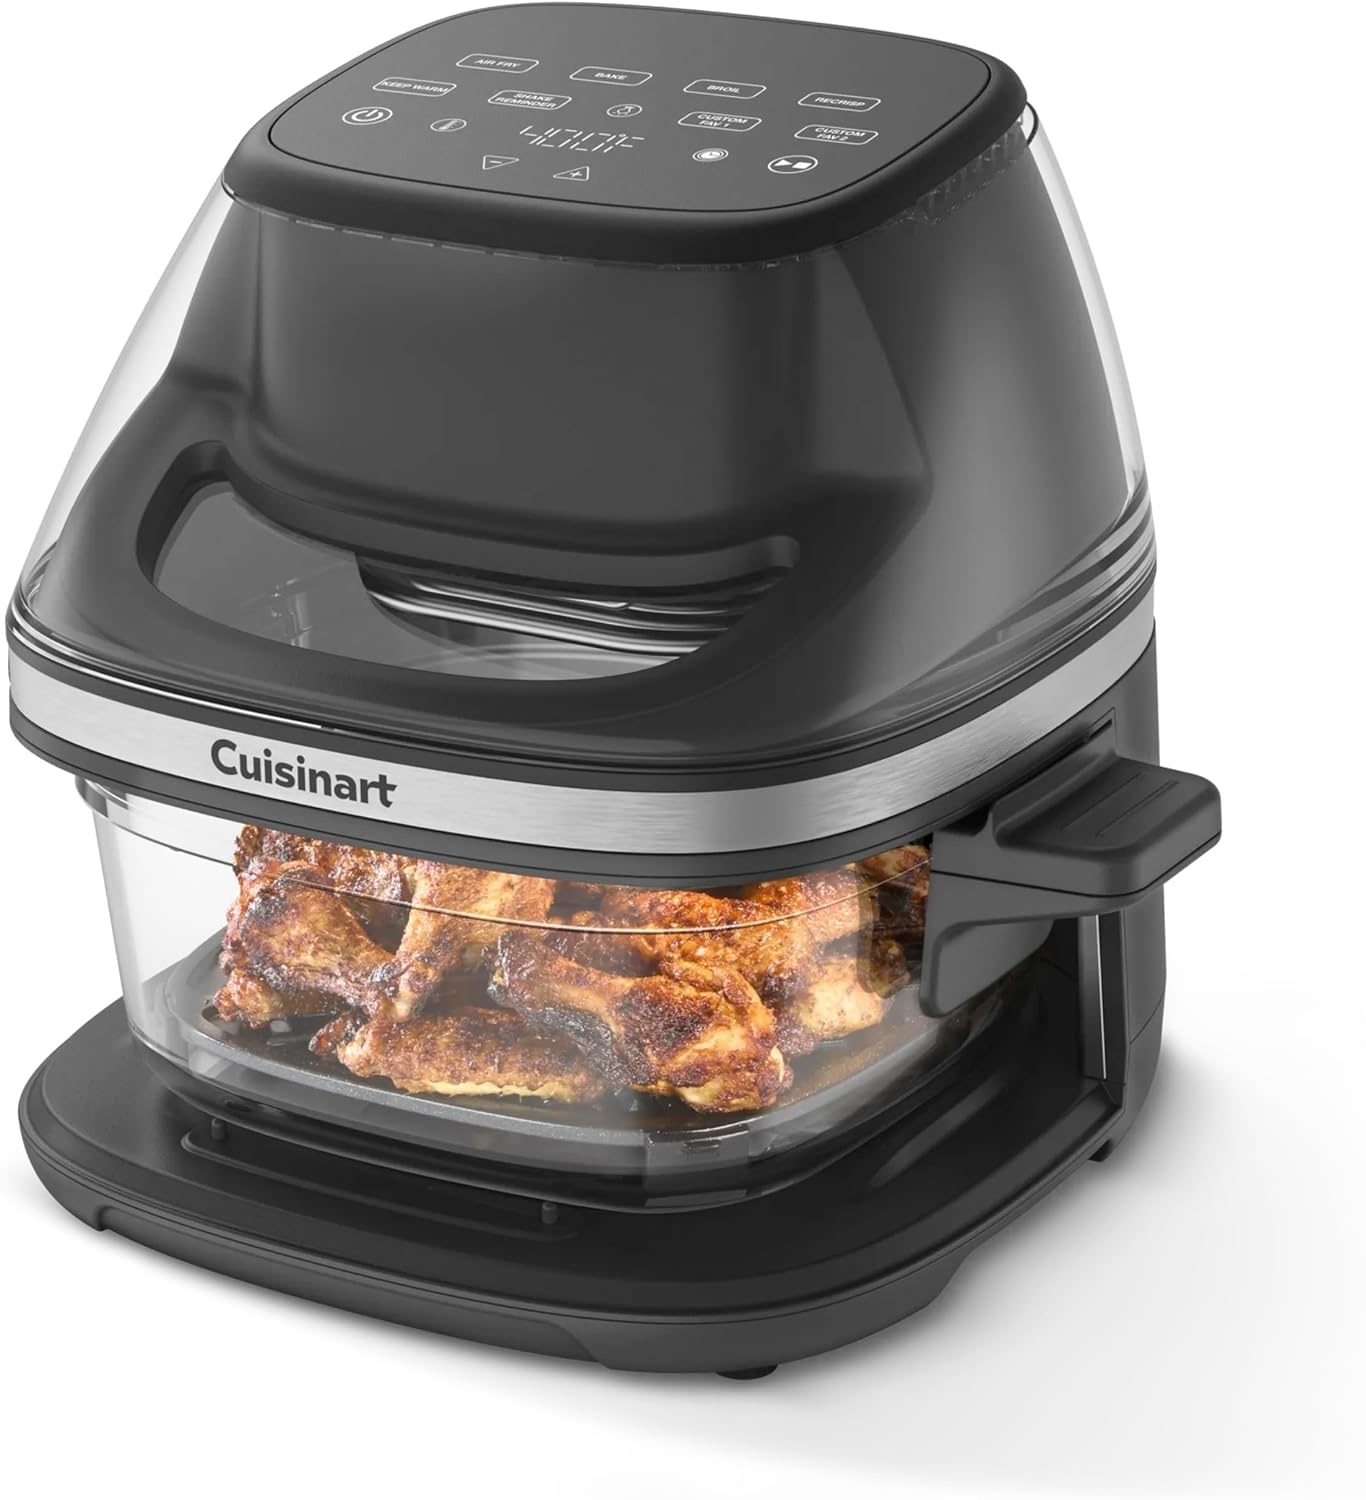
Small-kitchen pick: Cuisinart Air Fryer, Glass Basket & ClearView Window, 5 Functions, 4 Qt
 Visit on Amazon →
The feature that matters for this workflow is the glass basket and the ClearView window. During the fry test and the chicken thigh test you want to watch browning without pulling the drawer, because every time you open the machine you dump heat and reset the cook. Watching through glass keeps the temperature steadier and teaches you where the hot side of the basket is faster than any written log.
Five functions cover the modes most people actually use: air fry, roast, bake, reheat, and keep warm. The 4 quart size is the honest limitation. This is a two-person machine, and the flat floor means a full meal for four takes two batches. If your counter is tight and you cook for one or two, that trade is worth it.
Flaws but not dealbreakers: A glass basket is heavier than a coated steel one and wants gentler handling and hand washing. There is no rotisserie here, so skip this one if you want to spin a whole chicken.
Anyone in a small kitchen who wants to see the food while it cooks should start here.
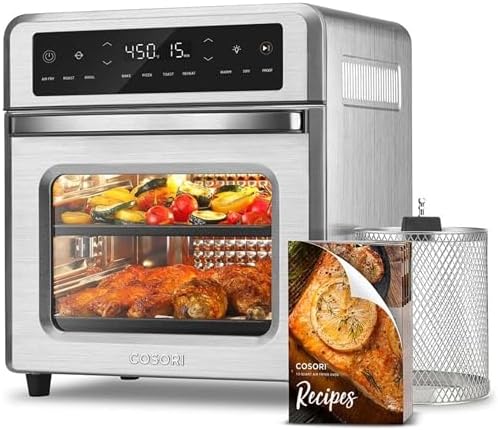
Big-batch pick: Cosori Air Fryer Oven, 13QT, 11-in-1, Rotisserie, Max 450°F, 6 Accessories
 Visit on Amazon →
This is the shape of machine that makes the airflow test easy to pass. It is an oven-style unit with a 13 quart capacity, which means a real flat cooking area and room for a single layer of food with space around it, and space around the food is what lets the fan do its job.
The 450°F ceiling matters for the chicken thigh step: high heat is how you render skin instead of steaming it. The rotisserie function is the reason to pick this over a drawer unit if you cook whole birds, and it comes with six accessories, which spreads the cooking across racks, a basket, and a rotisserie spit instead of one crowded drawer. Eleven functions is more than most people will ever use, but air fry, roast, bake, and dehydrate cover nearly everything.
Flaws but not dealbreakers: It is a big appliance, so measure your counter depth and the clearance above it before you order. Six accessories also means six things to wash, and the extra parts take up cabinet space.
Anyone cooking for a family or batch cooking for the week will get more out of this footprint.
The actual test workflow
Now the part you came for. Do these in order, on the same day, and write down what you see. A notebook or a note on your phone is enough.
Step one: the burn-off. Wash every basket, rack, and accessory by hand with warm soapy water, then dry them completely. Run the empty machine at its highest temperature for 10 to 15 minutes near an open window. New units give off a smell on the first hot run, and you do not want that smell in your food.
Step two: find out if it needs a preheat. Set the machine to 375°F and let it run empty for three minutes. Then cook a single slice of bread or a small handful of frozen fries with no oil. If the food browns evenly and quickly, your machine preheats like it means it. If it comes out pale and dry after the same time, treat every recipe as if it needs a three minute preheat, because it does.
Step three: the temperature check. Put an oven thermometer or a probe rated for high heat in the center of the basket, set the machine to 350°F, and let it run for 15 minutes. Read the thermometer at the 5, 10, and 15 minute marks and write the numbers down. Repeat at 400°F. The gap between what you set and what the probe reads is your machine's temperature swing, and you will use it to adjust every recipe from here on. If it runs hot, subtract the difference from your set temperature. If it runs cold, add it.
Step four: the frozen fry test. Cook one layer of frozen fries with no oil and no overcrowding. Shake the basket at the halfway mark and note whether one corner browns faster than the rest. That corner is your hot spot, and it will burn every casserole and every tray of vegetables you put in there until you learn to rotate the basket or leave that corner empty.
Step five: the chicken thigh crisp test. Pat two bone-in, skin-on thighs completely dry, season the skin, and cook them skin side up at 400°F until the skin is browned and the meat is cooked through. This is the test that separates an air fryer from a small oven with a fan. If the skin comes out crisp and the meat stays juicy, the airflow is doing its job. If the skin is rubbery and the meat is dry, the machine is steaming, and no amount of extra time will fix that.
Step six: the even heat test. Mix a small batch of muffin or cake batter and bake it in a pan that fits the basket. When it comes out, look at the top. A domed, evenly browned surface means the heat is even. A cake that rises on one side and stays flat on the other tells you the same thing the fry test did, only in a form you can slice.
Step seven: measure the usable footprint. Take a ruler and measure the flat cooking surface inside the basket, front to back and side to side. Write that number inside the cabinet door. Now you know exactly how much food fits in one layer, and you will stop overcrowding the machine out of optimism.
Step eight: the 30-day log. For the next month, write down what you cooked, the temperature you set, and how it came out. Once a week, run a fingertip over the coating and look for scratches, bubbles, or flakes. A basket that is flaking by week three is a basket that goes back, especially if the listing claims it is dishwasher safe.
When a step fails: fixes that work
- It runs hot. Subtract the swing from every set temperature and check again in a week. Most machines are consistent, just consistently off.
- One corner burns. Rotate the basket at the halfway mark, keep food to a single layer, and leave that corner empty or shield it with a small piece of perforated parchment.
- Food steams instead of crisping. Dry the surface of the food, raise the temperature, and cut the load in half. Wet food plus a crowded basket equals soggy results every time.
- The coating scratches early. Switch to silicone or wood tools and skip the abrasive sponge. If the coating flakes on its own with normal use, that is a defect, not wear.
- It smokes at high heat. Wipe the heating element area and the drip tray, drain fat more often, and ventilate the kitchen.
What the test costs you
Almost nothing. Two hours on a weekend, a probe or oven thermometer, and a notebook. That is the whole investment, and the thermometer is the only thing you might not already own.
The machines in this guide are the real purchase, and both are mid-range units rather than no-name bargains that run hot and flake by month three. Divide whatever you pay by the number of dinners you cook in a year, and the math gets small fast. The test is what protects that money, because a machine you have measured is a machine you can trust, and a machine you have not measured is a gamble with your dinner.
Do the four checks, log the numbers, run the month. Then cook.
That is the job. Your air fryer was built to do this. Let it.