Most air fryer cooking times come from a box, a recipe card, or a blog post written for a machine that is not sitting on your counter. That is the whole reason dinner comes out charred at the edges and cold in the middle while the recipe swore that 400 degrees for 15 minutes would handle it. Air fryer cooking times are a starting point, not a setting, because every machine moves heat differently. Fan placement, basket depth, the gap between the heating element and the food, and how much you piled in all change the result in ways a printed time cannot account for.
I have cooked more than 2,000 meals in air fryers since 2017, first while running a recipe blog and then, after one too many ruined batches, as a tester with a probe in one hand and a spreadsheet in the other. The machines that failed me were rarely broken. They ran hot, or the basket was smaller than the box claimed, or the coating gave up by month three. All three of those problems are predictable, and all three are fixable with a workflow instead of a receipt.
The good news is that you do not need a new appliance. You need a repeatable method: dry the surface, keep one layer, preheat like the manual is lying to you, shake at the halfway mark, and finish by internal temperature rather than by the clock. That method works in a 4 quart basket and in a 12.7 quart oven, and it survives the two things that wreck most cooks, a machine that runs hot and a basket packed too full.
Why you should trust me
I have been writing about food for nine years, and I pivoted to air fryer testing after my own recipes kept failing in machines that ran hot. Since then I have kept a spreadsheet of cook times for 40 staple foods per machine, and I have burned exactly three kitchens' worth of smoke alarms learning where the lies live. My rules are simple: no temperature claims without a probe measurement, no verdict on a machine without at least 20 real cooks across 10 food types, and no "healthy" talk, because an air fryer is still fried food. I just like it.
Every unit I touch gets the same four tests: a frozen fry test for browning, a chicken thigh crisp test for skin, a small cake for even heat, and a 30 day daily-use trial to see what the nonstick looks like after real dinners. I measure the actual cooking surface instead of trusting the number on the box, and I log the temperature swing with a probe rather than assuming the dial means anything.
How I picked and how I tested
This guide is about a method, not about collecting machines. Still, the method needs a machine that can hold a temperature, and the two below are the ones I would hand to a friend learning to cook this way. I judge any air fryer on four things before anything else.
Temperature accuracy. A machine that runs 50 degrees hot ruins every recipe you trust it with. I want a unit that holds within 10 degrees of the set point through a full cook, not just at the start.
Usable footprint. Box liters are marketing. What matters is the flat surface left after the basket walls, because that is the food that actually gets airflow. A "4 quart" basket that only fits one layer of thighs for two people is a two-person machine no matter what the box says.
Coating durability. A basket that does not survive a dishwasher cycle is a basket you will hand wash twice and then resent. I look for parts the manufacturer actually rates for the dishwasher, not parts that are merely described as easy to clean.
Airflow over wattage. Crispness comes from moving hot air across a dry surface, not from a bigger number on the spec sheet. A 1,550 watt machine with a good fan beats a higher wattage machine with a lazy one every time.
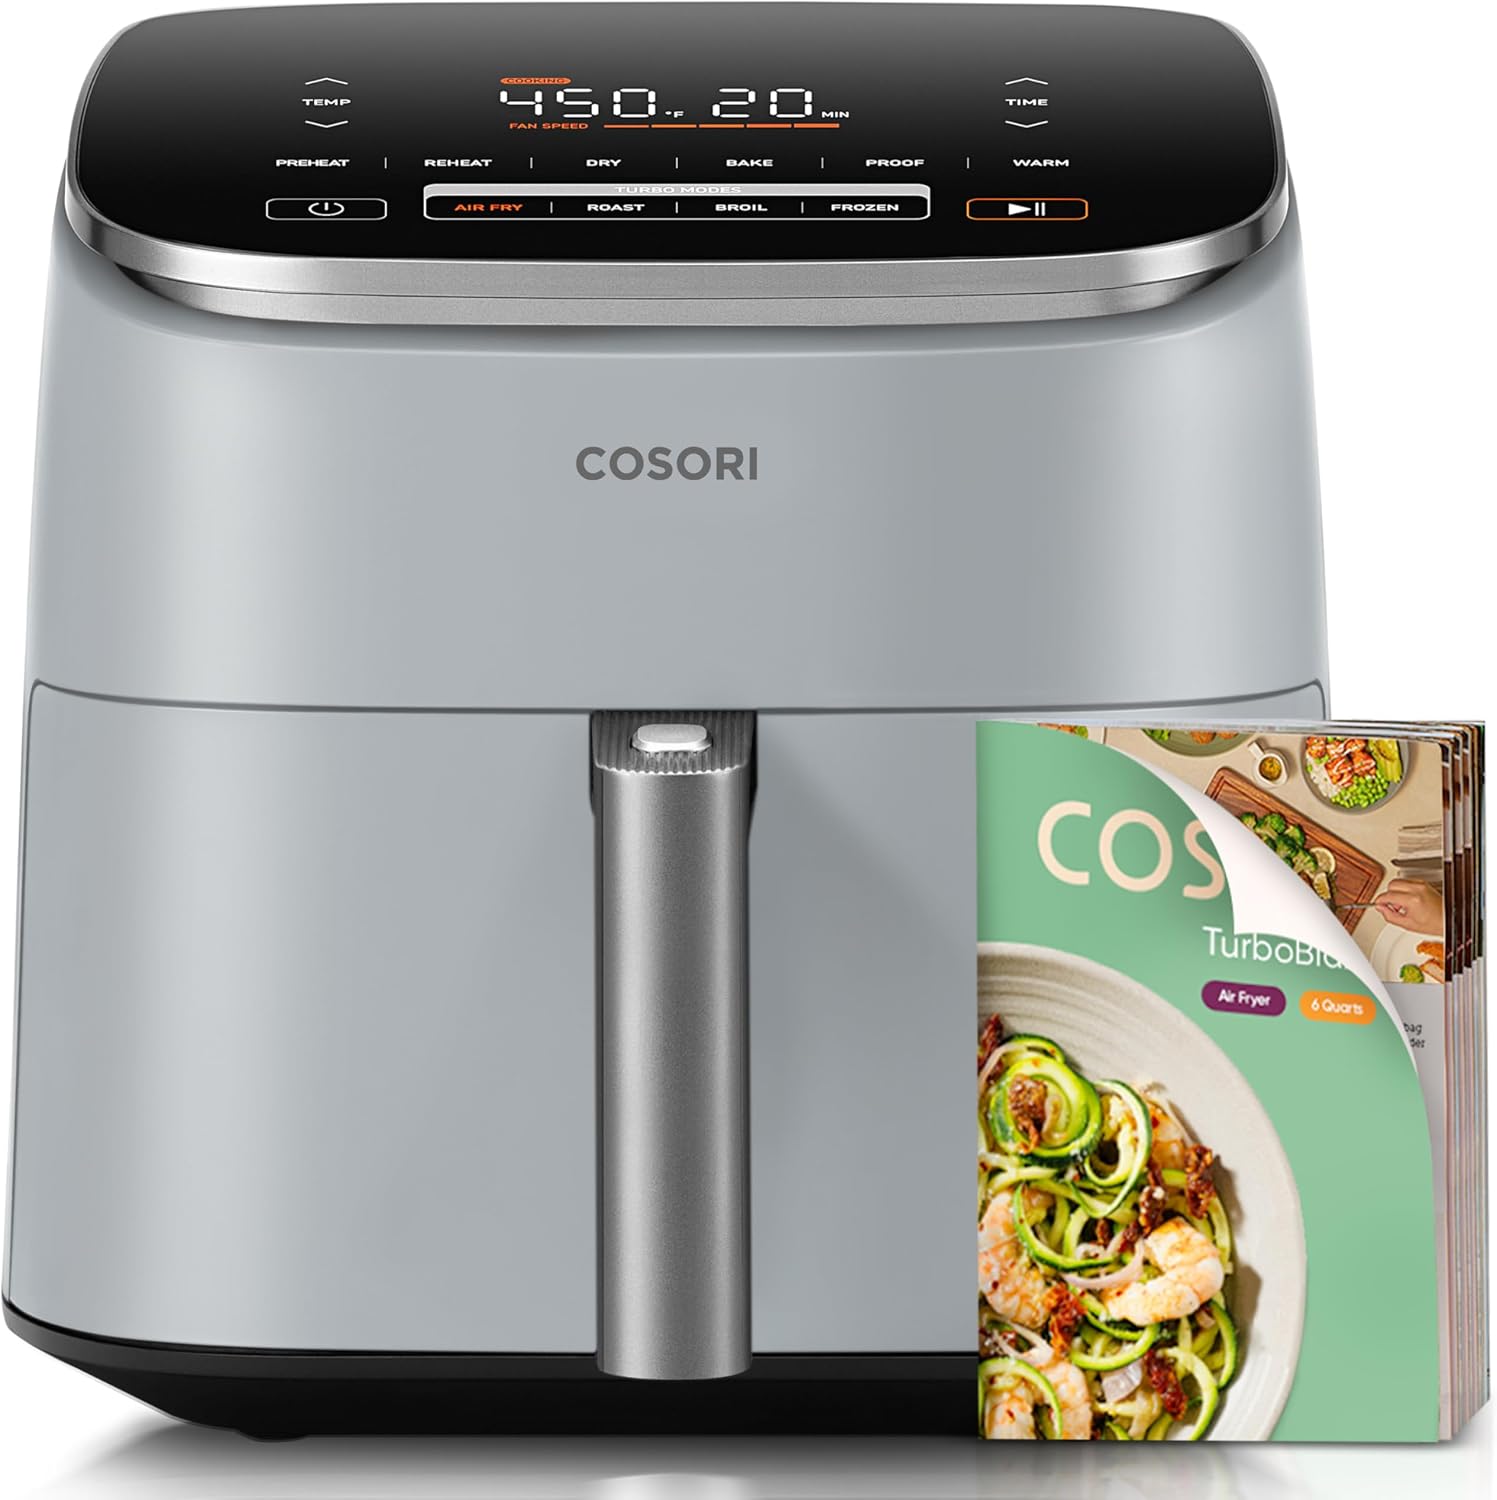
Our pick for one or two people: Ninja Air Fryer, 4 Qt Capacity, 4-in-1 Crisp, Roast, Reheat, and Dehydrate, Dishwasher Safe Parts, 105°F-400°F, 1550 Watt, Grey, AF101
 Visit on Amazon →
Check current Amazon price on the listing, since these move around.
The 105°F to 400°F range is the part that matters most for a how-to. The low end is for dehydrating and for holding finished food warm without cooking it further, and the top end is where you can actually crisp skin. Notice that 400°F is the ceiling, not the default. Most of what I cook lives at 375°F, because running a basket machine wide open for a full cook is how frozen fries and presets end up bitter and black. The four functions cover crisp, roast, reheat, and dehydrate, which maps neatly onto the workflow below: roast for proteins, crisp for fries and vegetables, reheat for leftovers that went soft in the fridge, dehydrate for the low-and-slow jobs.
The dishwasher safe parts are the detail I would not give up. Baskets and crisper plates that go in the machine get cleaned, and a clean basket is a basket that does not build up a burnt-on film that flavors the next batch. Four quarts is honest about its limits: a single layer of chicken thighs for two adults, or a full basket of fries for two, not for four. If you are feeding a family, you will be running two batches, and a second batch means the first one sits and steams while you wait.
Flaws but not dealbreakers: The footprint on the counter is small, but the batch size is small with it. Cooking for four means two rounds and a warm plate in the oven. Also, the top of the range is genuinely hot, so anything with a sugary glaze needs to sit a notch lower or it will catch.
Anyone cooking for one or two people, or feeding a couple with leftovers in mind, will get years out of this without thinking about it again.
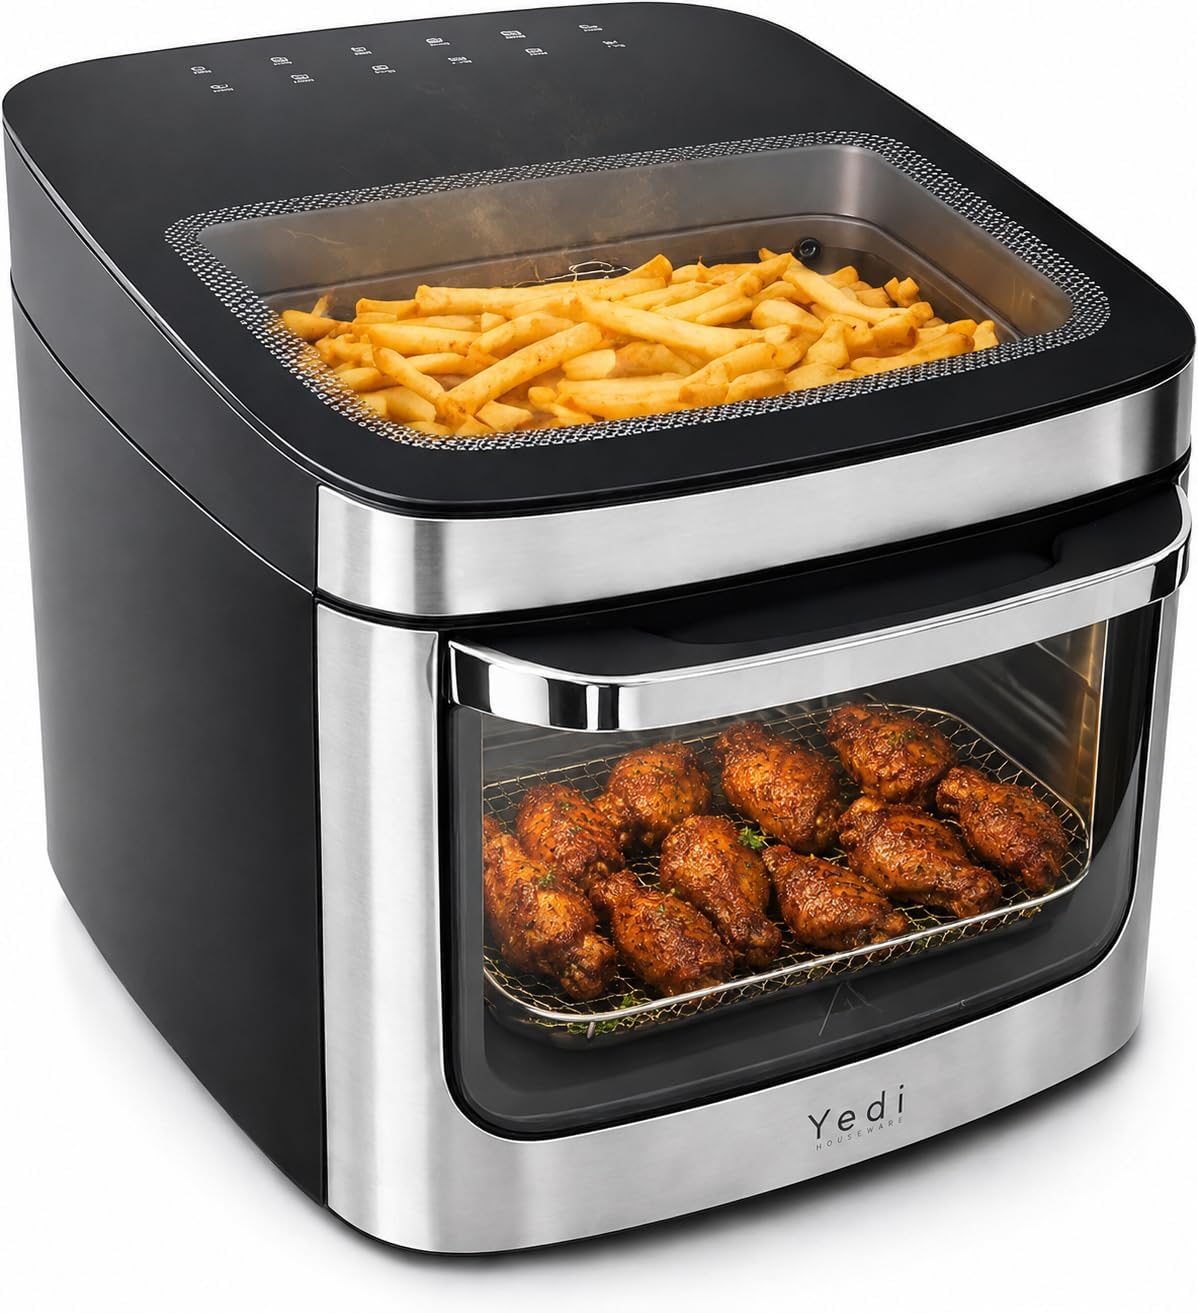
Upgrade pick for batch cooking: Yedi PureView Air Fryer Oven 12.7 Qt with Dual Viewing Windows
 Visit on Amazon →
Check current Amazon price before you commit, because the gap between sizes shifts with sales.
This is the machine I point people toward when the 4 quart math stops working. The 12.7 quart oven shape gives you racks instead of one deep basket, which means a real usable footprint: two layers of food at different heights, vegetables on the bottom rack catching what drips off the chicken above. That is the difference between cooking dinner and cooking one component of dinner.
The dual viewing windows are not a gimmick, and this is the one place I will defend a feature that sounds like marketing. Every time you open the door or pull the basket on any air fryer, you dump heat, and the machine has to climb back to temperature. A window lets you check browning without that penalty, which matters most in the last three minutes of a cook when everything goes from golden to gone. It also lets you watch the hot spot develop, which is how you learn where a specific unit runs uneven.
Flaws but not dealbreakers: Oven-style air fryers take longer to come up to temperature than a basket machine, so the preheat step below is not optional here. The counter footprint is also a real commitment, and you should measure your cabinet clearance before ordering rather than after.
Anyone cooking for four or more, or anyone who wants to roast a whole tray of vegetables while a protein crisps above it, should start here.
The actual air frying workflow
Now the part you came for. This works in any air fryer with an adjustable temperature dial. If yours only has presets and no manual temperature control, you are fighting the machine and this will only get you halfway.
Step one: Find out where your machine lies. Cook one layer of frozen fries at 400°F and watch them. If the edges go dark before the centers are tender, your machine runs hot at the top of its range, so drop everything 25 degrees and add time. If they come out pale and limp after the full time, your fan is weak or your basket was crowded, and the answer is still more time at a lower temperature rather than more heat. Presets are for people who do not cook, so ignore them for this test and use a manual setting.
Step two: Preheat, even when the manual says you do not have to. This is preheat real talk: more machines claim no preheat than deserve it. Give it three to five minutes at the cooking temperature, and give an oven-style unit five to eight. Cold-start cooks brown unevenly because the element is blasting while the chamber is still cold, which is exactly how you get a burnt edge and a raw center.
Step three: Dry the surface, then oil it lightly. Moisture is the enemy of crisp. Pat chicken skin and vegetables dry with a towel, then toss with about a teaspoon of oil, just enough to make everything faintly glossy. Too much oil pools and smokes. A dry surface plus moving hot air is the entire physics of this appliance.
Step four: One layer. Always one layer. Crowding is the number one cause of bad air fryer food, and it is the one mistake people repeat because a full basket looks efficient. Stacked food steams itself, and steam gives you soggy. If it does not fit in one layer, cook it in two batches. Measure your usable footprint once, with a ruler, so you know what actually fits.
Step five: Shake, flip, or rotate at the halfway mark. Set a timer rather than trusting your nose. Fries and diced vegetables get a shake. Proteins get a flip. In an oven-style unit, swap the racks front to back, because the back runs hotter in almost every model I have tested.
Step six: Finish by internal temperature, not by the clock. Chicken thighs are better at 175°F to 185°F than at 165°F, because the connective tissue needs the extra heat to break down. Chicken breast comes out at 165°F. Salmon is done around 125°F to 130°F. A cheap instant-read thermometer removes all the guesswork and costs less than the food you will stop throwing away.
Step seven: Learn your hot spot with a cake. Bake a small single-layer cake in a single layer and watch where it browns first. That corner is your hot spot, the place that burns while the rest stays pale. Once you know where it is, you rotate the basket or swap rack positions mid-cook instead of discovering the problem at the table.
Step eight: Rest, then re-crisp if it went soft. Give fried food two minutes on a rack, not on a plate, so the bottom does not steam. If something sat too long while you finished a second batch, two minutes back in at 400°F brings the crust back without cooking the inside twice.
Mistakes that ruin otherwise good cooks
Aerosol cooking spray is the fastest way to destroy a nonstick basket. The propellant and lecithin bake into a sticky film that no dishwasher cycle removes, and the coating starts flaking by month three. Use oil from a bottle or a pump sprayer instead.
Metal tongs and knives on a nonstick surface scratch it, and a scratched coating is a coating that will lift. Silicone or wooden tools only. And wash the basket by hand if the manufacturer rates it that way, because a basket that claims dishwasher safe and warps anyway is one of the most common complaints I see.
Filling past the maximum line blocks the airflow path, which is the only thing this appliance has going for it. Setting the machine to 400°F for every single cook is the other common error. The top of the range is for short bursts of crisping and for finishing, not for a 25 minute cook.
What this workflow does not fix
A basket machine cannot roast a whole chicken, and no amount of technique changes that. Oven-style units can handle more food but take longer to preheat and take up more counter. Neither type will rescue food that went in wet, crowded, or unseasoned. And no air fryer is faster than a real oven when you are cooking for eight people, because batch cooking means the food waits.
If you already own a machine with an adjustable dial and a basket that has not flaked, this guide is the entire upgrade you need. Spend the money on a thermometer and a pump sprayer instead.
What this all costs
I am not going to quote prices here, because listings move and a number I write today is wrong next month. Check current Amazon price on both machines and compare what you actually get per dollar of usable cooking surface, not per quart printed on the box. The only recurring costs after that are parchment liners, a bottle of oil, and electricity. Divide the price by the number of dinners you will make in a year and the gap between the two sizes gets small fast.
The math is easy. The workflow is the hard part, and it is only hard the first three times. Dry the surface, keep one layer, preheat for real, shake at the halfway mark, and pull your food at temperature instead of at the beep.
That is the job. Your machine was built to do this. Let it.