Every air fryer I have tested runs hot out of the box. Not slightly hot. I have logged swings of 40 to 60 degrees above the set temperature in the first six minutes of a cook, which is exactly long enough to scorch the edges of a chicken thigh while the middle stays pink. That is why crispy air fryer food is rarely a recipe problem. It is a temperature and airflow problem, and you can fix both in your own kitchen tonight without buying anything new.
I have been cooking in these machines for nine years, first as a food blogger and then as a tester, and the routine below is the one I run on every unit that comes through my kitchen. It works in a square metal basket. It works in a glass cooking vessel. It works in the cheap machine your cousin handed down. The only thing that changes is how far off your machine runs and how hard you have to compensate for it.
Here is the whole method, plus the two machines I would hand a friend who asked me where to start.
Why you should trust me
I have cooked more than 2,000 meals in air fryers. Every unit gets the same treatment: a frozen fry test, a chicken thigh crisp test, a cake for even heat, and a 30-day daily-use trial where the machine has to cook my actual family dinner, not a staged photo shoot. I keep a spreadsheet of cook times for 40 staple foods per machine and a temperature log for every cook, taken with a probe.
That log is why I am blunt about this. I will not tell you a machine holds temperature because the box says so. I will not call a basket dishwasher safe until it has survived my dishwasher. And I do not test with presets. I test with recipes, because a preset is a button and a recipe is dinner.
How I picked and how I tested
The two machines below are not here because they are the only good ones. They are here because they represent the two designs you are actually choosing between in 2026: a coated metal basket and a glass cooking vessel. Both got the same frozen fry test, the same chicken thigh test, the same cake, and the same 30 days of real use.
I measured the usable footprint of each cooking surface with a ruler instead of trusting the box liters. I ran each one at high heat with a probe in the chamber to see how far it drifted once it settled. I put every removable part through the dishwasher until something warped or the coating gave up.
The numbers I trust: a machine that holds within 10 degrees of the set temperature is doing its job. A drift of more than 25 degrees means you are cooking by feel, and the routine below matters even more. A basket that comes out of the dishwasher with its coating intact after a month is a basket you will still like in year three.
The two machines I would start with
The design question comes first, because it changes how you cook. A metal basket gives you a deep, square cooking surface and a drawer you can shake with one hand. A glass vessel lets you watch the browning without pulling the drawer open, and it holds heat differently once it is up to temperature. I keep both in rotation for different jobs.
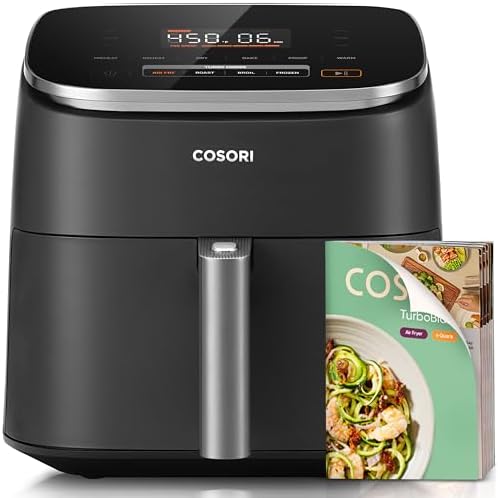
Our pick: COSORI Pro Gen 2 Air Fryer 5.8QT, Upgraded Version with Stable Performance & Sleek New Look, 13 One Touch Functions, 100 Paper & 1100 Online Recipes, Dishwasher-Safe Detachable Square Basket, Black
 Visit on Amazon →
The COSORI Pro Gen 2 is the machine I recommend to most people, and the reason is the basket. It is square, it is 5.8 quarts on the spec sheet, and the usable footprint is close to what the box claims, which is rarer than it should be. Square corners mean four chicken thighs fit without stacking, and stacking is what steams food instead of crisping it. The basket detaches and is rated dishwasher safe, which matters to me more than any preset ever will.
Thirteen one-touch functions and 1,100 online recipes are on the feature list. I ignore most of them. The frozen fry preset on nearly every machine is set too hot and will burn the edges of thin fries before the centers cook through. Use the manual temperature and time controls with the routine below and you will get better results than the buttons give you.
Flaws but not dealbreakers: The presets are optimistic and the paper recipe book is thin. Neither one changes how the machine cooks.
Check current Amazon price before you order, because this model moves around during sales.
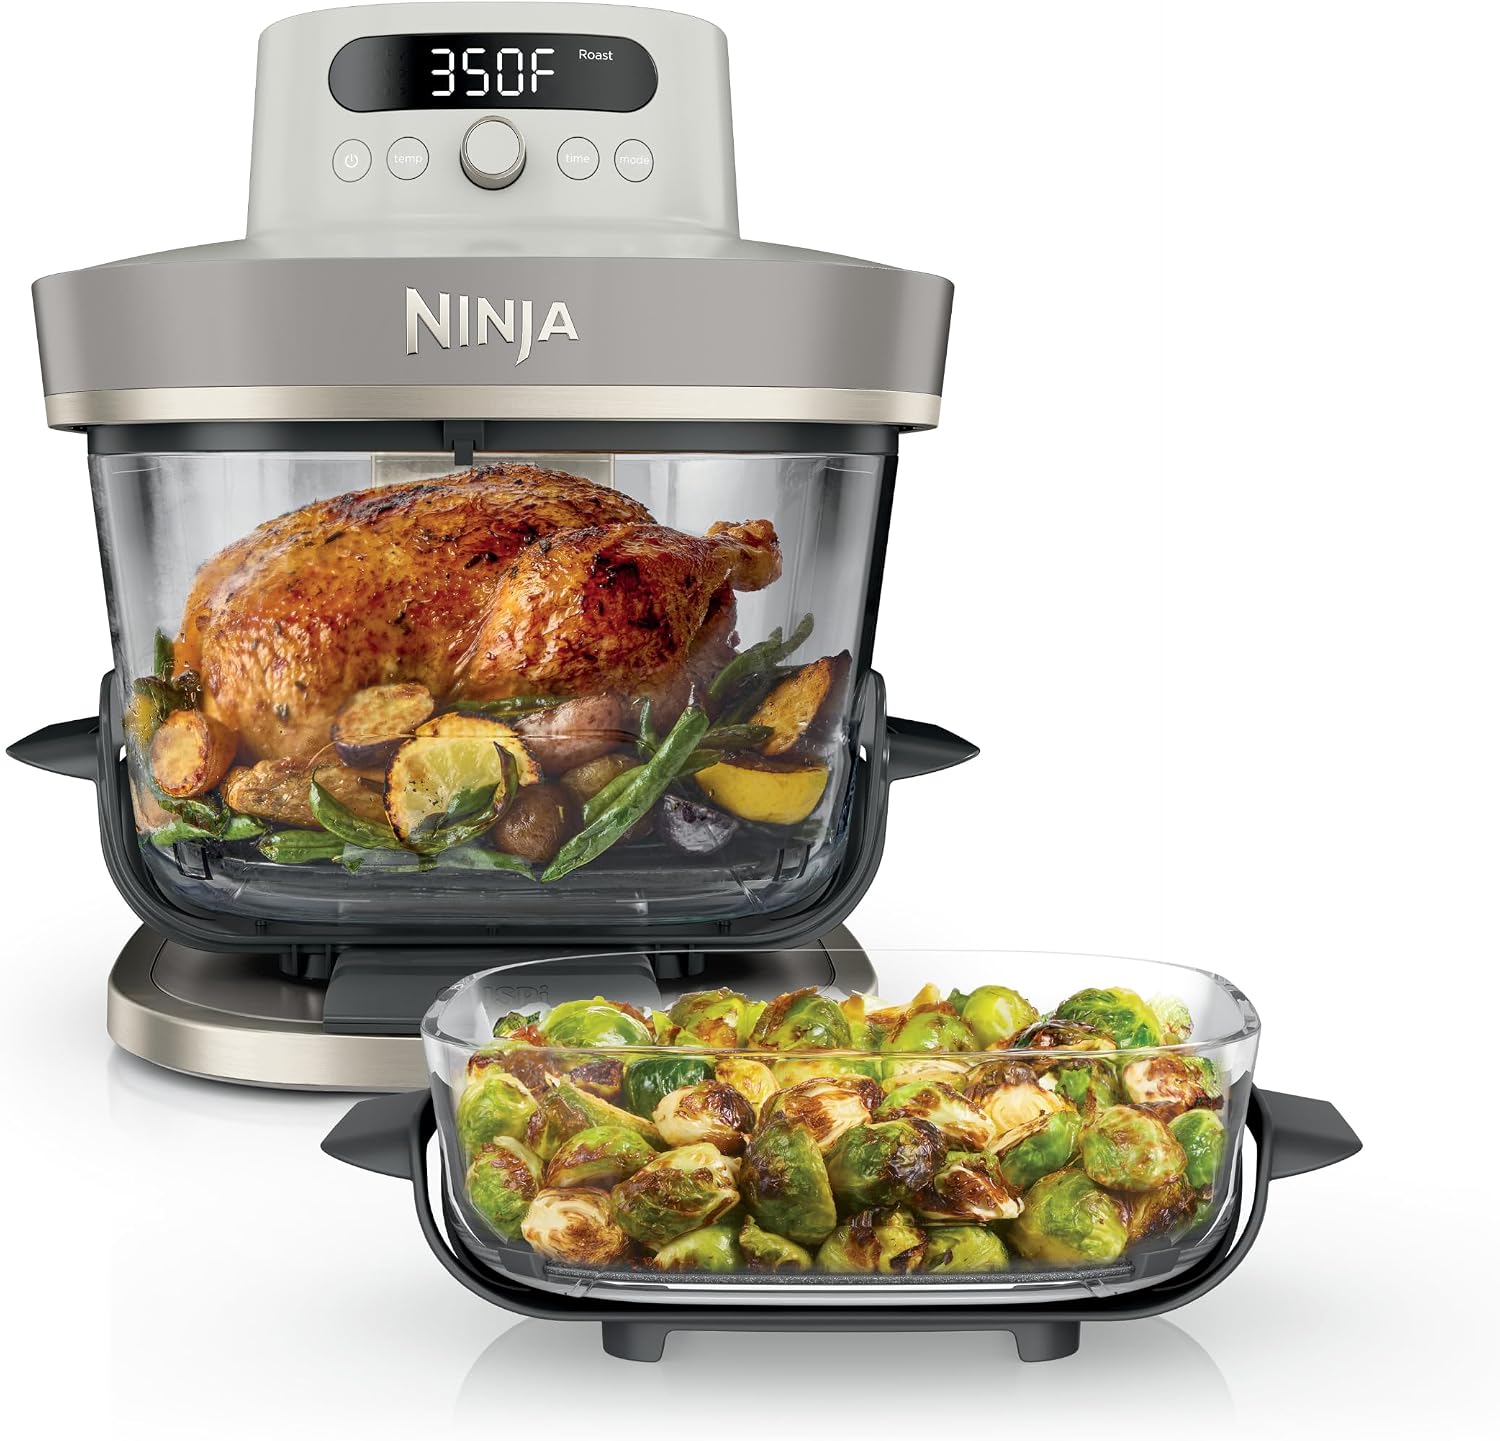
Upgrade pick: Ninja Crispi Pro Glass Air Fryer, 6-in-1, Amazon Exclusive Bone & Champagne
 Visit on Amazon →
The Ninja Crispi Pro is the one I reach for when I want to watch the cook. The cooking vessel is glass, which changes two things. First, you can see the browning without opening the machine and dumping all the heat, so you stop guessing and stop opening the drawer every four minutes. Second, glass comes up to temperature more slowly than a thin metal basket and then holds it, so the first two minutes behave differently from the last ten.
The 6-in-1 functions cover the modes most people actually use, and the bone and champagne finish is the Amazon Exclusive look, which is a nicer thing to leave on a counter than another black box. The trade-off is weight and care. Glass is heavier, it is not a vessel you shake one-handed, and you treat it like any other piece of glass cookware.
Flaws but not dealbreakers: It is heavier than a basket machine and takes longer to preheat. If counter space is tight, measure before you commit.
Check current Amazon price before you decide, and check the footprint against your counter.
The routine, step by step
This works on any machine with manual temperature control. If yours only has presets, pick the closest one and shorten the time.
Step one: Preheat for real. Most machines claim you can skip it. You cannot. Run the empty basket at your target temperature for three to five minutes. A cold chamber drops 30 degrees the second food lands in it, and that drop is what turns a breaded cutlet soggy before it turns crisp.
Step two: Dry the surface. Pat everything dry, especially wings, potatoes, and anything you thawed. Surface moisture has to boil off before browning can start, so a wet potato spends eight minutes steaming and two minutes crisping instead of the reverse.
Step three: Oil lightly, not a bath. A teaspoon to a tablespoon, tossed through, is enough. Aerosol cooking sprays can leave a sticky film on a coated basket that bakes on and never quite comes off. Use a spray bottle you filled yourself or toss the food in a bowl.
Step four: Respect the usable footprint. One layer, no stacking, and leave a little gap between pieces. If two pieces touch, the space between them steams. This is the single most common reason people think their air fryer does not crisp.
Step five: Set 25 degrees below the recipe. The recipe you are following was written on somebody else's machine, probably one that runs hot. Start 25 degrees lower than the recipe says, then add time if you need it. You cannot un-burn a batch, but you can always cook it two more minutes.
Step six: Shake or flip at the halfway mark. Set a timer and actually use it. The corner nearest the heating element is the hot spot on almost every machine, so the pieces at the back need to trade places with the pieces at the front.
Step seven: Finish with a short high-heat pass. For the last two to three minutes, push the temperature to 400 degrees. That final blast drives off the last of the surface moisture and gives you the crust that a steady medium temperature will not.
Step eight: Rest on a rack, not a plate. A plate traps steam under the food and softens the bottom within a minute. A wire rack lets the underside stay crisp while the inside settles.
Step nine: Clean it while it is still warm. If the basket is rated dishwasher safe, it goes in the dishwasher. If you have a glass vessel, let it cool, then wash it with warm soapy water and a soft sponge. Never use a silicone brush or a metal scouring pad on a coated basket. That is how coatings die young.
Where most people go wrong
The first mistake is overcrowding. A 5.8-quart basket does not cook 5.8 quarts of food at once if you want crisp results. Fill it about halfway in a single layer and you will get better texture than a full basket every time.
The second mistake is trusting the presets. Frozen fries do not need 400 degrees for 18 minutes on every machine. They need a lower start, a shake, and a high finish. The preset exists because it is easy to program, not because it is right.
The third mistake is parchment liners with holes too small to pass air. Airflow is the whole mechanism. If you block the perforations at the bottom of the basket, you have built an oven with a fan that does nothing. If you use a liner, use one sized for your basket with real openings.
The fourth mistake is judging doneness by the clock instead of the food. Cook times shift with how cold the food is, how full the basket is, and how far your machine drifts. Learn what your food looks like at the right moment and the timer becomes a suggestion.
The fifth mistake is ignoring smoke. If your machine smokes at 400 degrees, it is usually residual oil on the heating element, not a defect. Clean the element area and the smoke goes away.
What this routine costs you
The method itself costs four extra minutes of preheat and one extra timer check. That is it. The two machines are the real purchase decision, and both are listed at Check current Amazon price on Amazon right now, so check before you buy because both move during sale events.
The math that matters over five years is not the sticker. It is how many dinners the machine actually cooks. A basket that survives the dishwasher and a cooking surface with a real usable footprint will get used four or five nights a week. A machine that runs hot, smokes, and needs hand washing gets used twice and then lives in a cabinet. Divide the cost by the number of nights you will genuinely use it and the answer usually sorts itself out.
The short version
Preheat for real. Dry the food. Oil it lightly. Keep it in one layer. Cook 25 degrees below the recipe. Shake at the halfway mark. Finish hot. Rest on a rack. Clean it before the residue bakes on.
Do those nine things and the machine matters far less than the method. The COSORI Pro Gen 2 is the easy recommendation for most kitchens because the square, dishwasher-safe basket does exactly what the routine needs. The Ninja Crispi Pro is the upgrade for anyone who wants to watch the cook through glass and does not mind a heavier vessel. Pick the one that fits how you actually cook, then run the routine until it is muscle memory. That is how you get crispy air fryer food every night instead of every third attempt.