Most people learn how to use an air fryer by ruining the first three batches. I know, because I ruined mine. I'm Priya, a food blogger in Chicago who spent nine years developing recipes and then got tired of watching good food come out of badly calibrated machines, so I moved into air fryer testing full time. I've cooked more than 2,000 meals in these things and set off exactly three kitchen smoke alarms doing it.
Here's the short version before the details. An air fryer is a small convection oven with a loud fan, and almost every mistake people make comes from treating it like a deep fryer or like a microwave. It is neither. It moves hot air, and the food that crisps well is the food that hot air can actually reach.
That one idea, airflow first, fixes most of what goes wrong: soggy fries, pale chicken, burnt corners with raw middles. The rest is temperature accuracy and basket size, and I'll get to both.
Why you should trust me
Nine years of recipe blogging taught me that a machine which runs hot will wreck every recipe you trust it with, so I test every unit the same way: a frozen fry test, a chicken thigh crisp test, a cake test for even heat, and a 30-day daily-use trial. I keep a spreadsheet of cook times for 40 staple foods per machine.
Two rules I don't break. No temperature claims without a probe reading, and no verdict on a machine until I've cooked at least 20 meals across 10 food types in it. I also don't do "healthy" talk. An air fryer is still fried food. I just like it, and I like it crisp.
What an air fryer actually does
Direct answer: it is a countertop convection oven. A heating element and a fan sit above the basket, and the fan pushes hot air down and around the food. That's the whole machine. No oil bath, no magic.
Which means crispness is about airflow, not wattage. A 1,700W unit with a weak fan loses to a 1,400W unit with a good one. When someone tells me their new air fryer isn't as good as the old one, nine times out of ten the basket is more crowded or the fan has less room to work.
Temperature accuracy is the other half. A machine that runs 40 degrees hot will burn the outside of a chicken thigh before the inside reaches a safe temperature. That's why I log every cook with a probe, and why "it says 380" means nothing until you check what it actually holds.
Basket size: measure the usable footprint, not the number on the box
Direct answer: box liters are marketing. Usable footprint is the flat cooking surface left after the basket walls and the fan housing. A 6 quart basket with steeply sloped walls can hold less food than a 5 quart with straight ones.
Practical math. For two people, you want room for two chicken thighs or a pound of fries in a single layer. For four people, either a bigger single basket or a dual-basket machine, because you cannot stack food in an air fryer without steaming the bottom layer. If you cook one protein at a time, a compact basket is fine and takes less counter. If you regularly cook two things at once, two baskets beat one big one, since they run separate timers and separate temperatures.
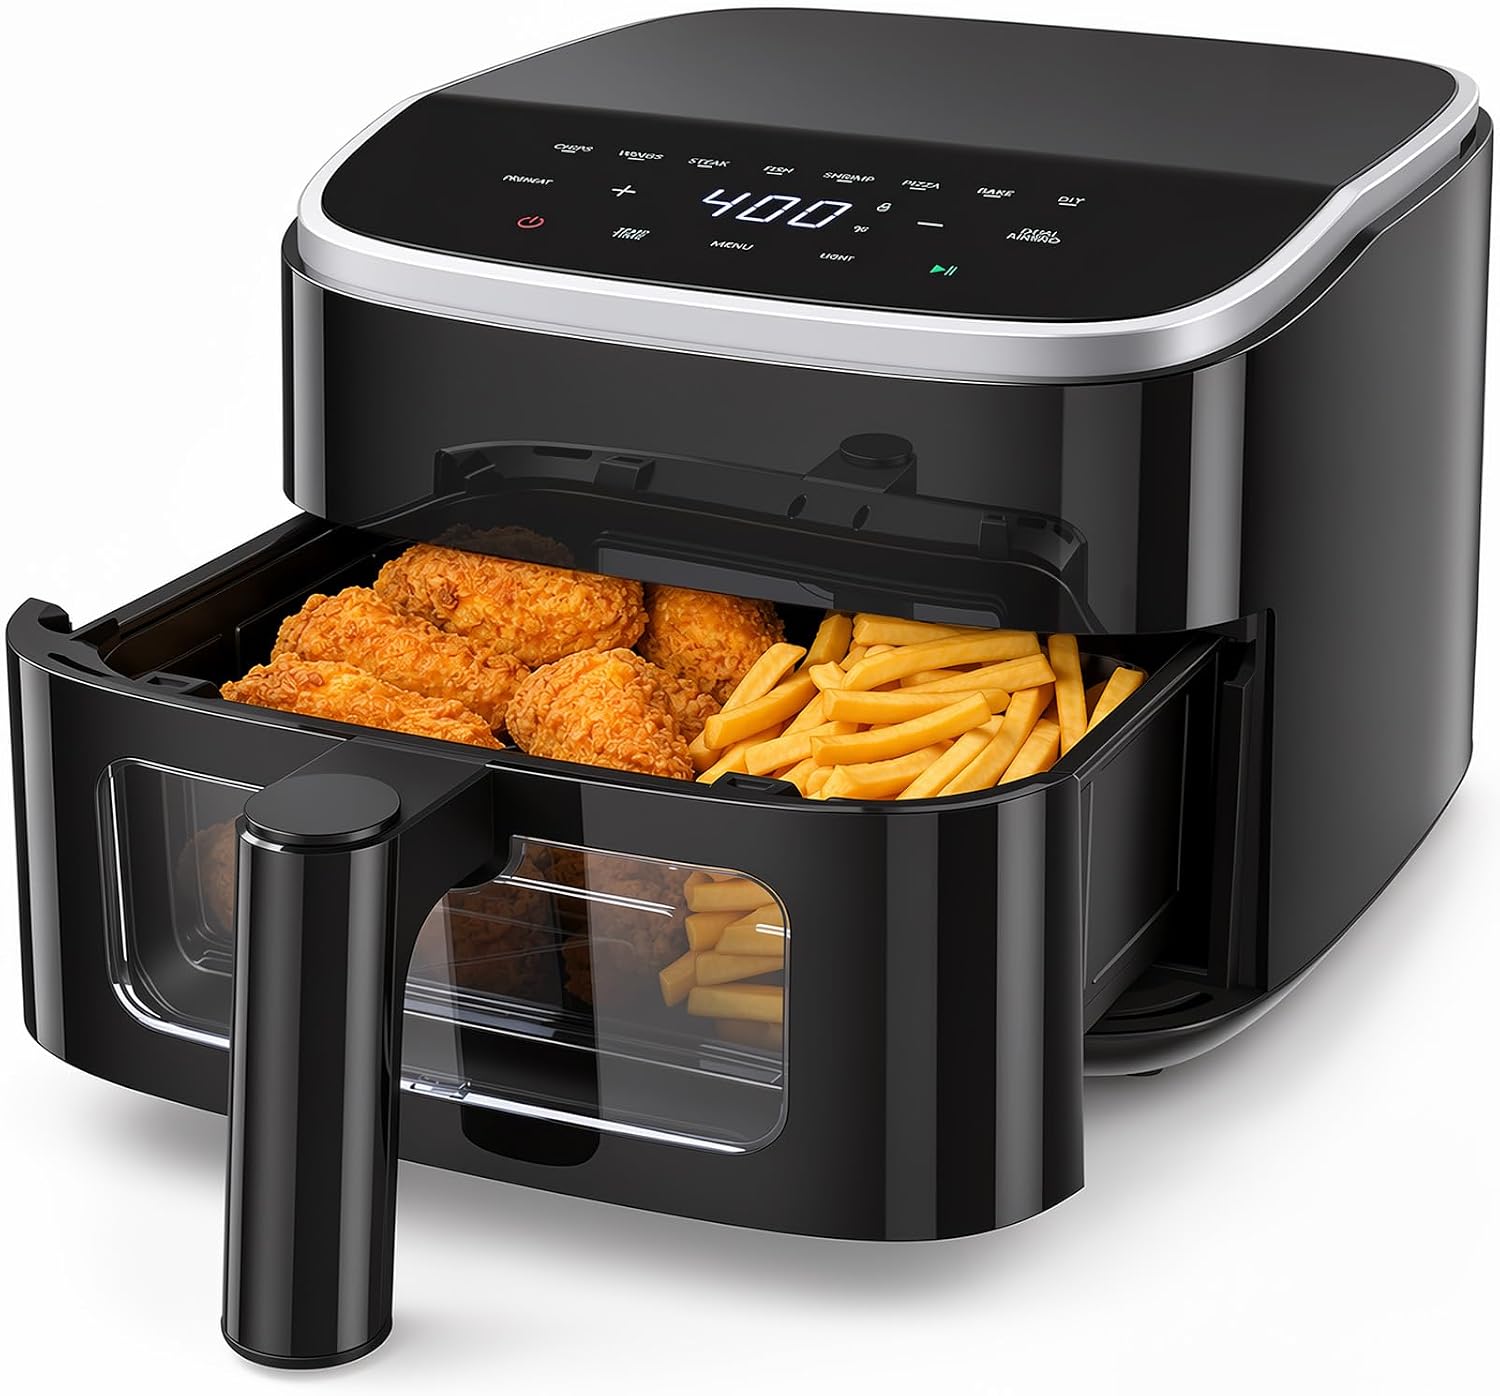
Compact pick: OLIXIS 4QT Air Fryer with Visible Window, 1500W Digital Touchscreen Air Fryer with 8 Presets, Auto Shut Off & Nonstick Dishwasher Safe Basket, 60-Min Timer, Max 400°F
 Visit on Amazon →
This is the size I point people toward when they cook for one or two, or when their kitchen counter is the size of a cutting board. The 4 quart basket handles a single layer of fries, two chicken thighs, or a small tray of vegetables.
The visible window is the feature I care about most here. The single biggest cause of uneven cooking is pulling the basket open every four minutes to check, and every time you do that you dump heat. With a window you watch color instead of guessing at the clock.
The rest of the spec sheet is standard for the class: 1500 watts, a digital touchscreen, eight presets, a 60 minute timer, a maximum of 400°F, and auto shut off when the timer runs out. The basket is nonstick and listed as dishwasher safe. That 400°F ceiling matters, because it is where frozen fries and wings actually crisp rather than dry out.
Flaws but not dealbreakers: 4 quarts means batches if you're feeding four people. A window also needs a wipe after greasy cooks, so build that into your routine.
Anyone cooking two portions at a time, or short on counter space, will get the most out of this one.
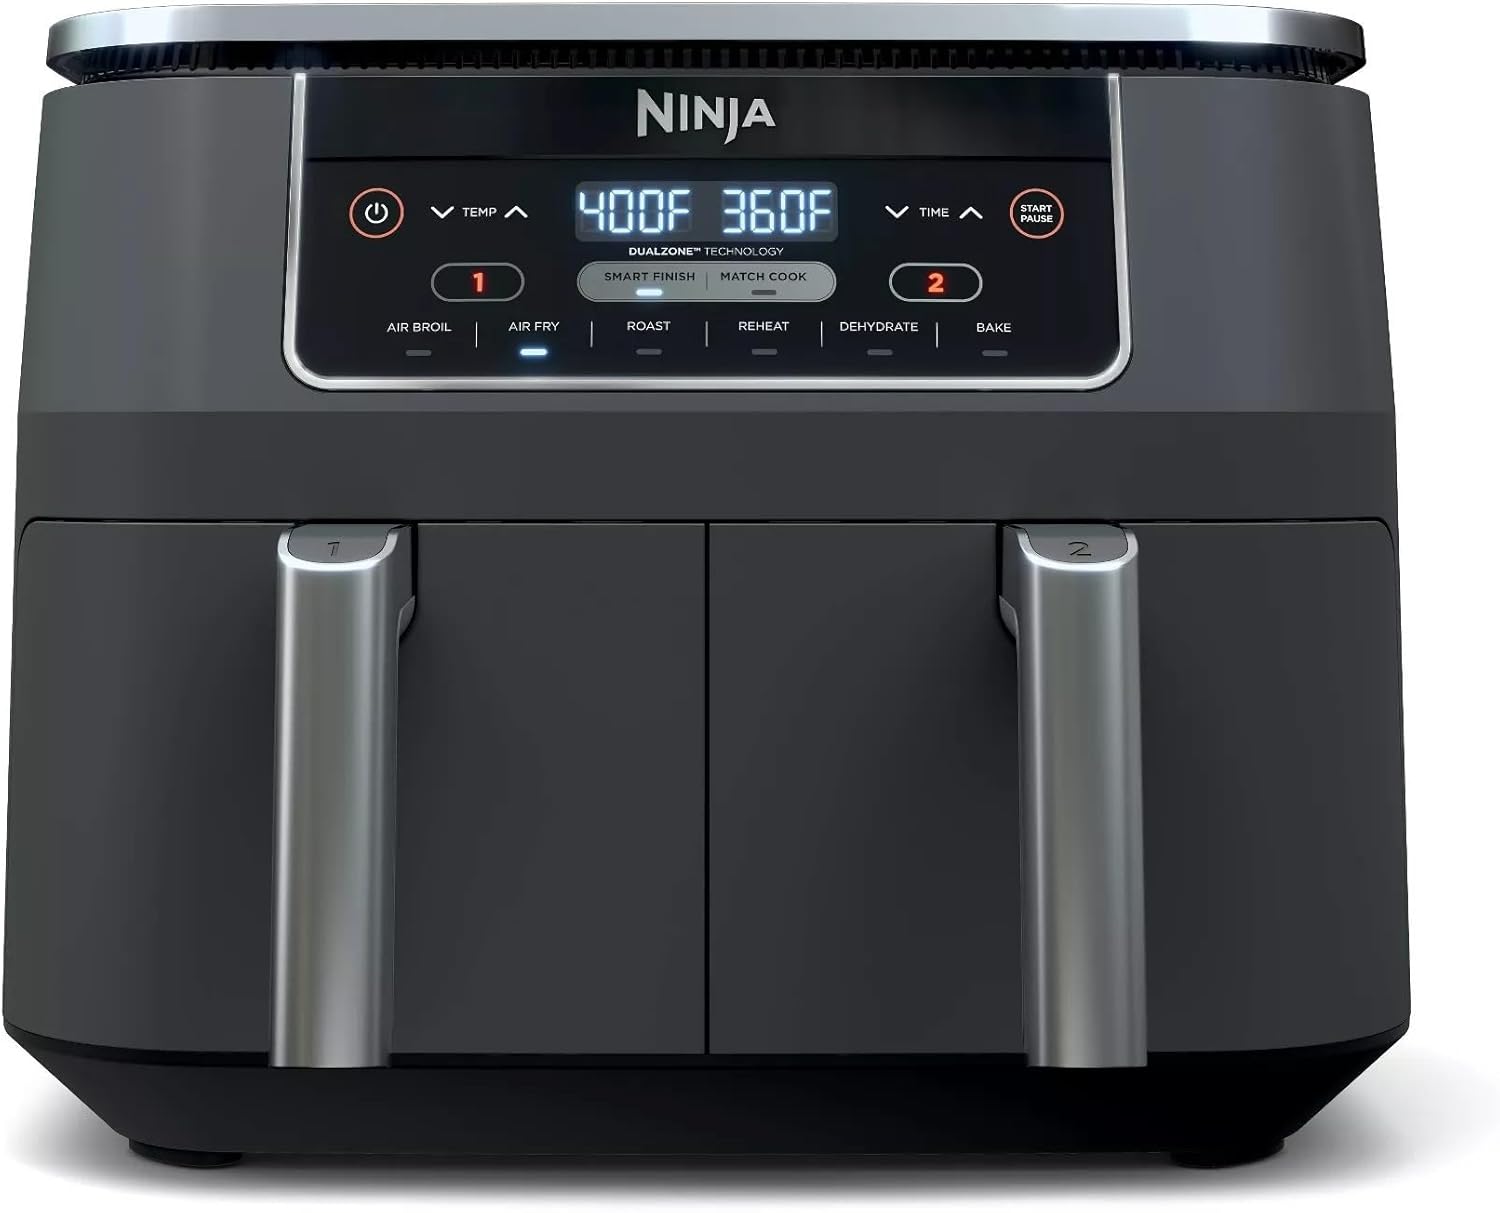
Family-size pick: Gourmia Air Fryer - 10 Qt Dual Basket Capacity, Stainless Steel
 Visit on Amazon →
Two baskets, ten quarts total, stainless steel body. This is the configuration I recommend to families, because it solves the problem a single big basket cannot: cooking two foods at two different temperatures at the same time. Chicken in one basket at 380°F, vegetables in the other at 400°F, both done when you sit down, with no first batch going cold on the counter while you wait.
Dual basket machines also help with crowding. When there are two chambers, you stop piling food into one, and piled food steams. The stainless steel finish is a practical bonus too, since it wipes down cleanly instead of showing every fingerprint the way matte black plastic does.
Flaws but not dealbreakers: the footprint is real. Measure your counter and your upper cabinets before ordering, because a 10 quart dual unit needs clearance above it for heat and for loading. It's also two baskets to wash instead of one, and if you hate dishes, that is a genuine cost.
Anyone feeding three or more people, or meal prepping two proteins for the week, should start here.
How to set the temperature and time: the eight steps
This is the workflow I run on any air fryer, regardless of brand.
Step one: pick a real temperature, not a preset. Presets are averages, and averages burn frozen fries. Start at 400°F for anything frozen and breaded, 380°F for skin-on chicken pieces, 375°F for thick cuts of meat, 390°F for vegetables you want charred at the edges.
Step two: convert down from your oven recipe. Air fryers move heat faster than a full-size oven. Drop the oven temperature about 25 degrees, cut the time by roughly 20 to 25 percent, and check early the first time you make something.
Step three: single layer only. Nothing sits on top of anything else. If it does, it steams, and steamed food is pale and limp.
Step four: leave the gaps. Air has to move between pieces. A basket packed edge to edge cooks from the outside in, which is exactly how you get burnt corners and a cold middle.
Step five: shake or flip at the halfway mark. Set your own timer if the machine doesn't remind you. Fries, nuggets, and small pieces need a shake. Thick proteins need a flip.
Step six: probe the thick stuff. Poultry goes to 165°F in the thickest part, checked with a thermometer, not judged by color. This is the step people skip and then blame the machine for.
Step seven: rest for three to five minutes. Carryover heat finishes the cook and the juices redistribute instead of running out onto the plate.
Step eight: cool, then clean. Give the basket ten minutes before it touches water. Thermal shock is how nonstick coatings start to flake.
Do you actually need to preheat?
Direct answer: yes for short cooks, no for long ones. Anything that finishes in under 15 minutes, fries, nuggets, shrimp, leftovers, benefits from three minutes of empty-basket heat at the target temperature. It is the difference between crisp and soggy.
For a 25 minute chicken thigh cook, those three minutes are noise. Skip it.
About machines that advertise "no preheat needed": in my logs, those units still cook noticeably better after a warm-up cycle. The claim is about convenience, not results. When in doubt, run it empty for three minutes.
How to load the basket so food crisps instead of steams
Direct answer: think of the basket as a chimney, not a bowl. Hot air enters from the top, so the top surface of the food has to be exposed.
Don't line the basket with parchment or foil unless you're cooking something that would fall through, and if you do, never let the liner block the fan intake. Don't stack. Don't fill past about two thirds of the basket depth, because the fan needs headroom. If your machine came with a rack, use it, since a rack gives you a second airflow path under the food.
Pat food dry before it goes in. Surface moisture turns to steam, and steam fights crisp every time.
How to clean the basket without wrecking the coating
Direct answer: read the manual, then decide whether the dishwasher claim is worth testing. Nonstick baskets labeled dishwasher safe sometimes warp or dull after a year of hot cycles, and once the coating scratches, food sticks permanently.
What I do: warm soapy water, a soft sponge, a silicone brush for the corners, and a soak if something is baked on. No metal tongs, no steel wool, no abrasive powder. Never put a hot basket into cold water.
If your manual says dishwasher safe and you run it on the top rack, that's your call. I hand wash mine. It takes 90 seconds.
Cook times for the foods you cook most
Starting points from my log. Your machine may run hot or cool, so check early the first two times you make something.
- Frozen fries: 400°F, 15 to 18 minutes, shake at 8
- Bone-in chicken thighs: 380°F, 22 to 25 minutes, flip at 12
- Chicken breast: 375°F, 18 to 20 minutes, flip at 10
- Salmon fillets: 390°F, 8 to 10 minutes, no flip
- Chicken wings: 380°F, 22 to 24 minutes, shake at 12
- Halved Brussels sprouts: 390°F, 15 to 18 minutes, shake at 8
- Frozen nuggets: 400°F, 10 to 12 minutes, shake at 6
- Reheating pizza: 350°F, 3 to 4 minutes
- Toast: 400°F, 3 to 4 minutes, flip at 2
Two caveats. These assume a single layer in a preheated basket. And thick proteins still need a probe, no matter what the timer says.
The mistakes that ruin air fryer food
Crowding the basket is number one. It causes most "my air fryer doesn't crisp" complaints, and it has nothing to do with the machine.
Number two is running too hot on thick food. 400°F is right for frozen fries and wrong for a bone-in thigh, which needs a lower temperature so the inside cooks before the skin burns.
Number three is aerosol oil sprays. Many contain lecithin, which builds a sticky film on nonstick that is nearly impossible to remove. Use a pump sprayer, or toss food with a teaspoon of oil in a bowl before it goes in.
Number four is expecting deep-fry results from wet batter. Batter needs an oil bath to set. Air fryer fried chicken works with a dry dredge or a breadcrumb coating, not a liquid batter.
Number five is not shaking. Small pieces need to move, or the ones touching the basket bottom stay pale while the top layer burns.
What this all costs
The compact 4 quart class is the cheaper entry point. The 10 quart dual basket class costs more, mostly for the second chamber and the stainless body. Both links above show the live figure, so check current Amazon price before you decide.
The accessories you'll actually want are a probe thermometer, a silicone brush, and a pump oil sprayer. Everything else on the market is optional.
Do the math on meals, not on the box. A machine you use four nights a week for two years costs a few cents a meal. A machine that sits in a cabinet because the basket was too small or too annoying to wash is the expensive one, no matter what it cost.
The bottom line
Learning how to use an air fryer comes down to four habits: preheat for short cooks, keep everything to one layer, set a temperature instead of trusting a preset, and clean the basket like you want the coating to last. Get those right and even a modest machine turns out genuinely crisp food. Get them wrong and the best air fryer on the market will still hand you pale, soggy disappointment.
Pick the basket size that matches how many people you actually feed, then cook.